Creating a Custom Kindle Dictionary
 Kevin
\\
Kevin
\\
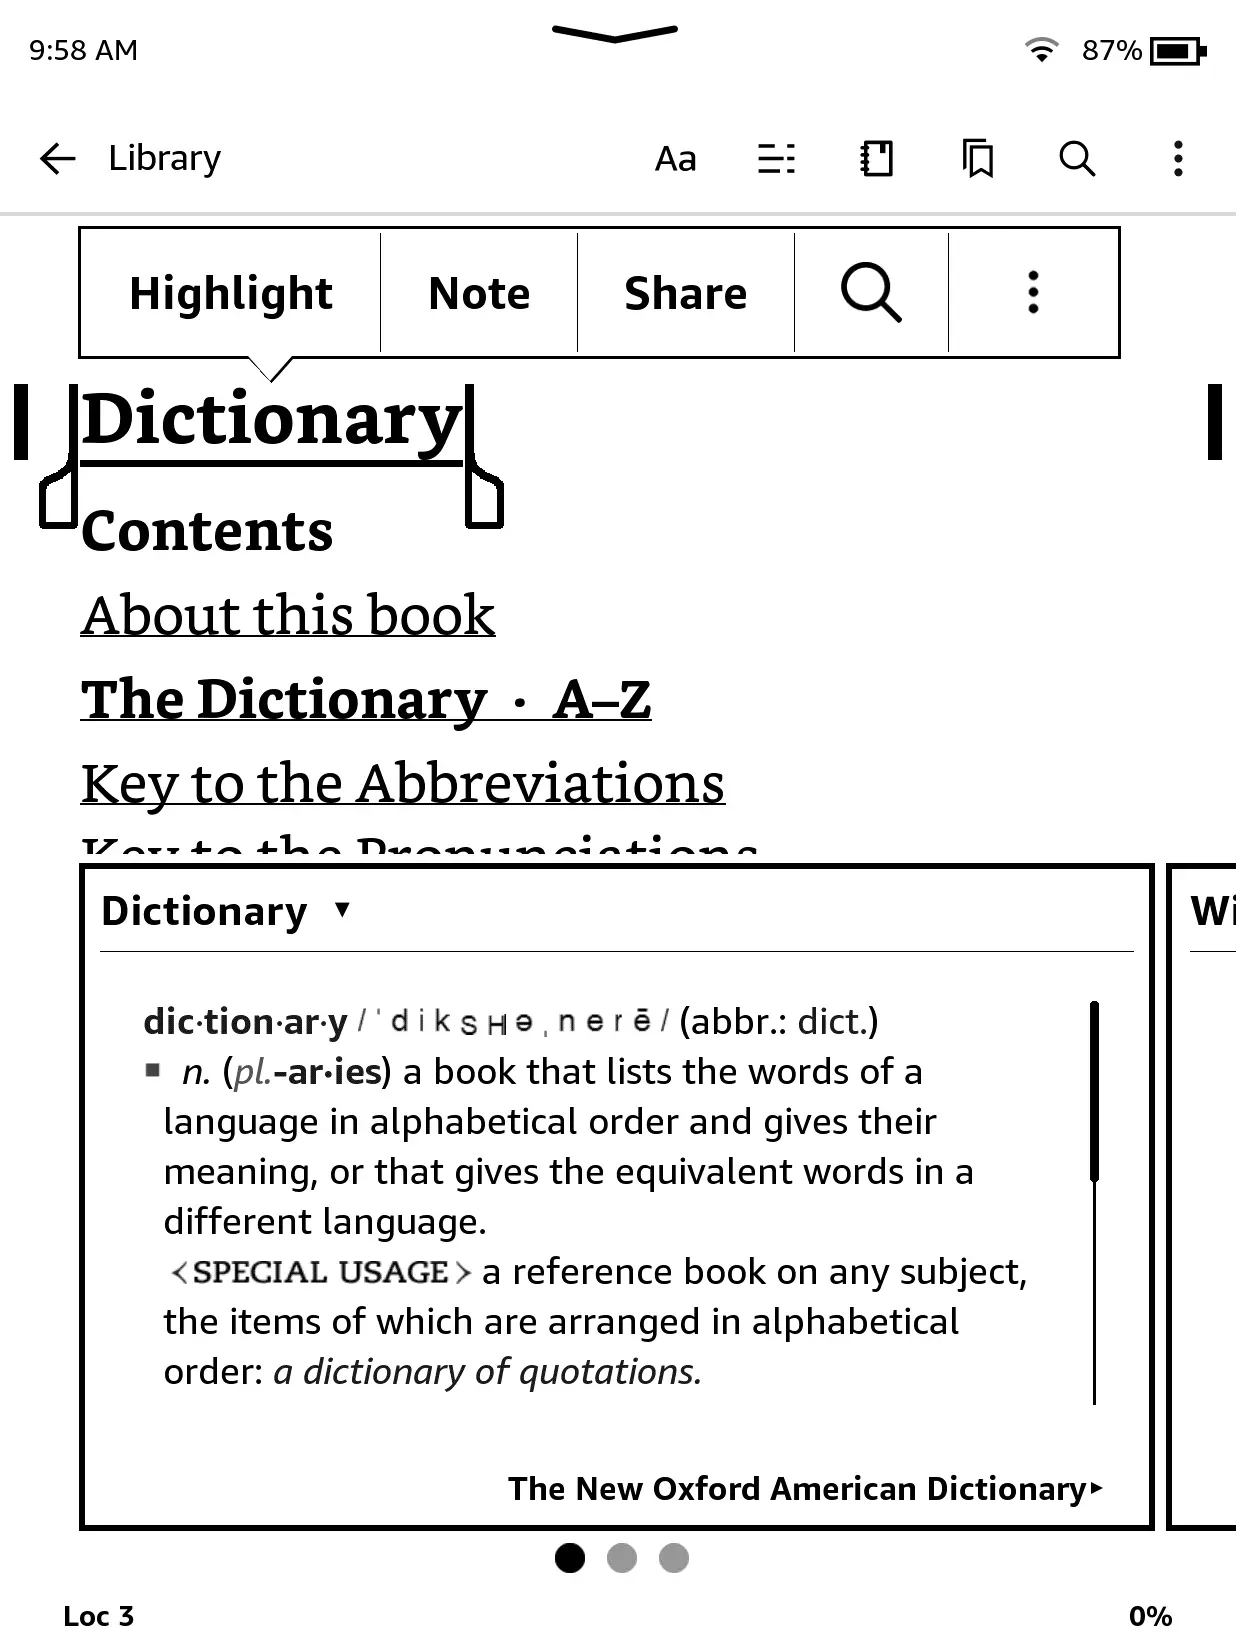
One of the most convenient parts about reading on a Kindle is the built-in dictionary. Here is how it looks when reading an English book:
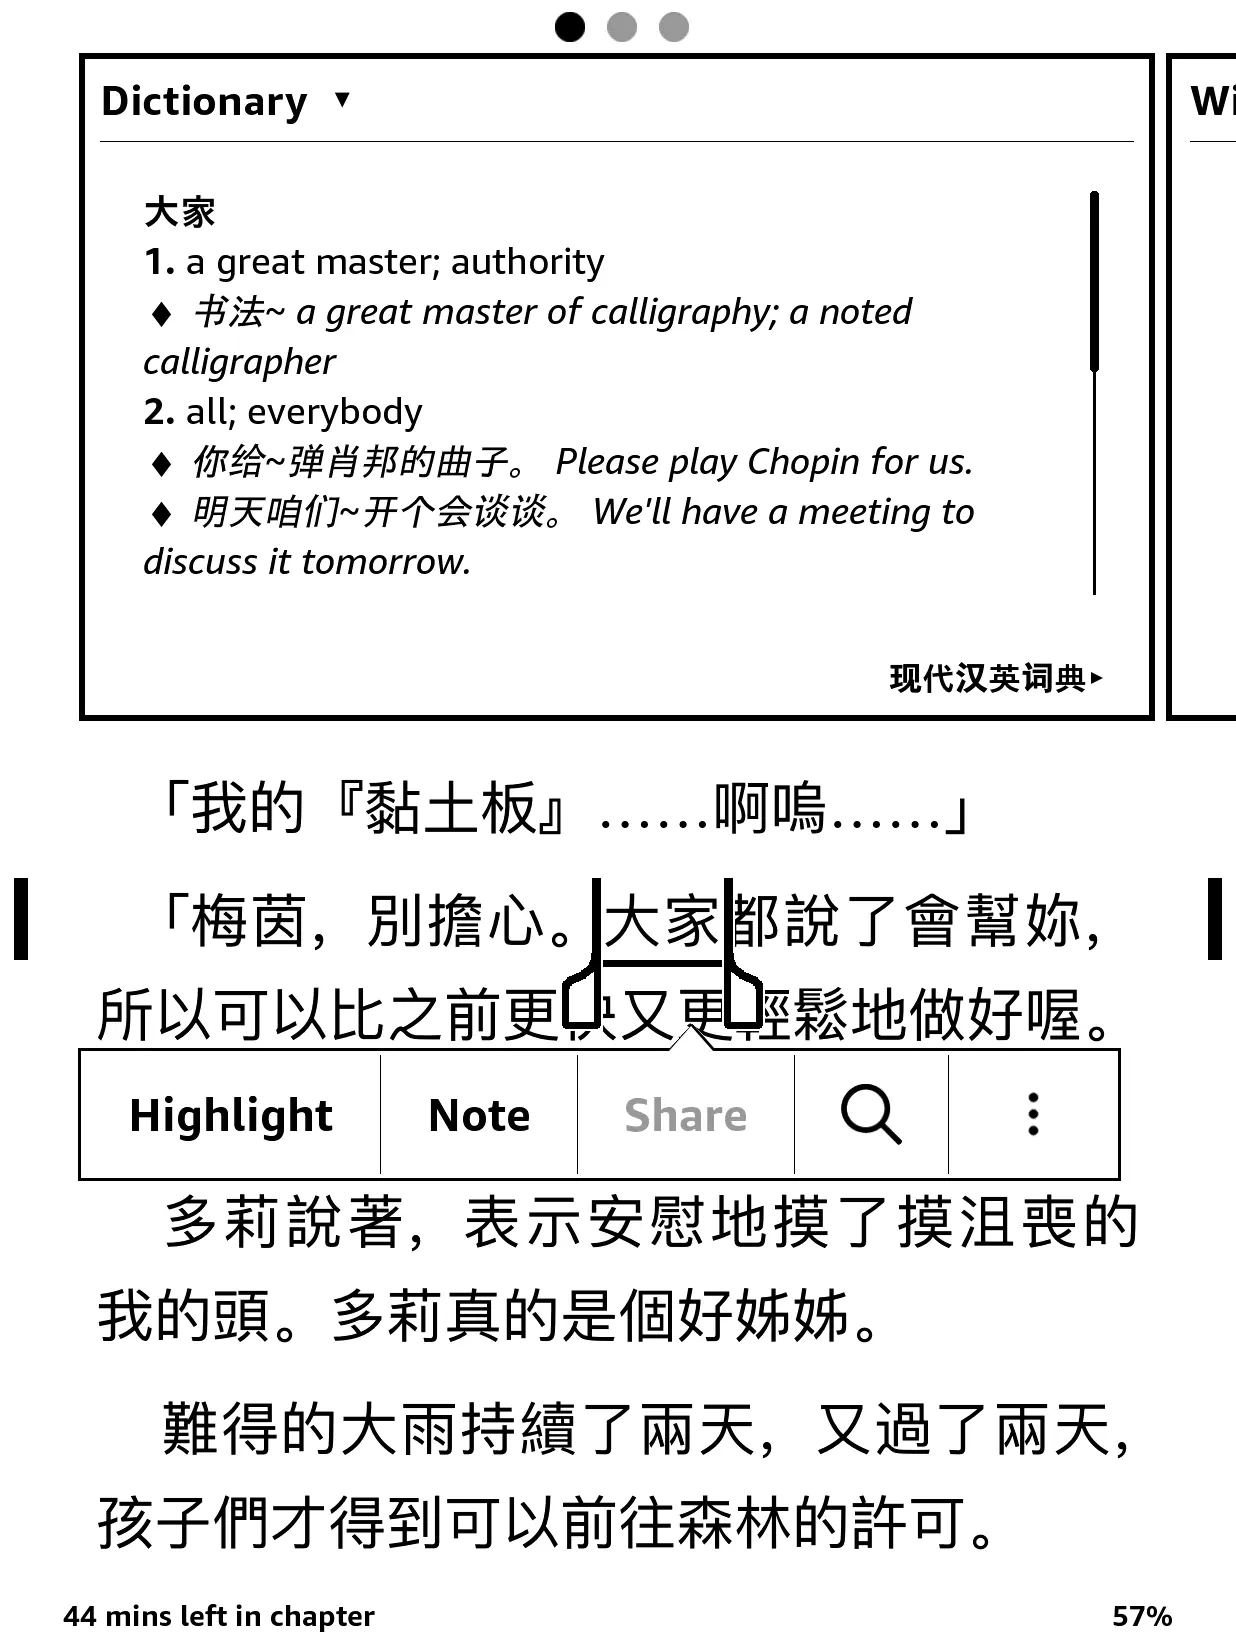
In addition to English, Amazon also provides dictionaries for other languages. However, the one for Mandarin Chinese sucks. It is Chinese-English for some reason instead of Chinese-Chinese (maybe I need to update my language/region on my Kindle?) and only works with simplified script. Traditional script is what is used in Taiwan where I currently live, and that is what I prefer to read if possible. Here's how that one looks, when it works at all with the traditional script books I read:
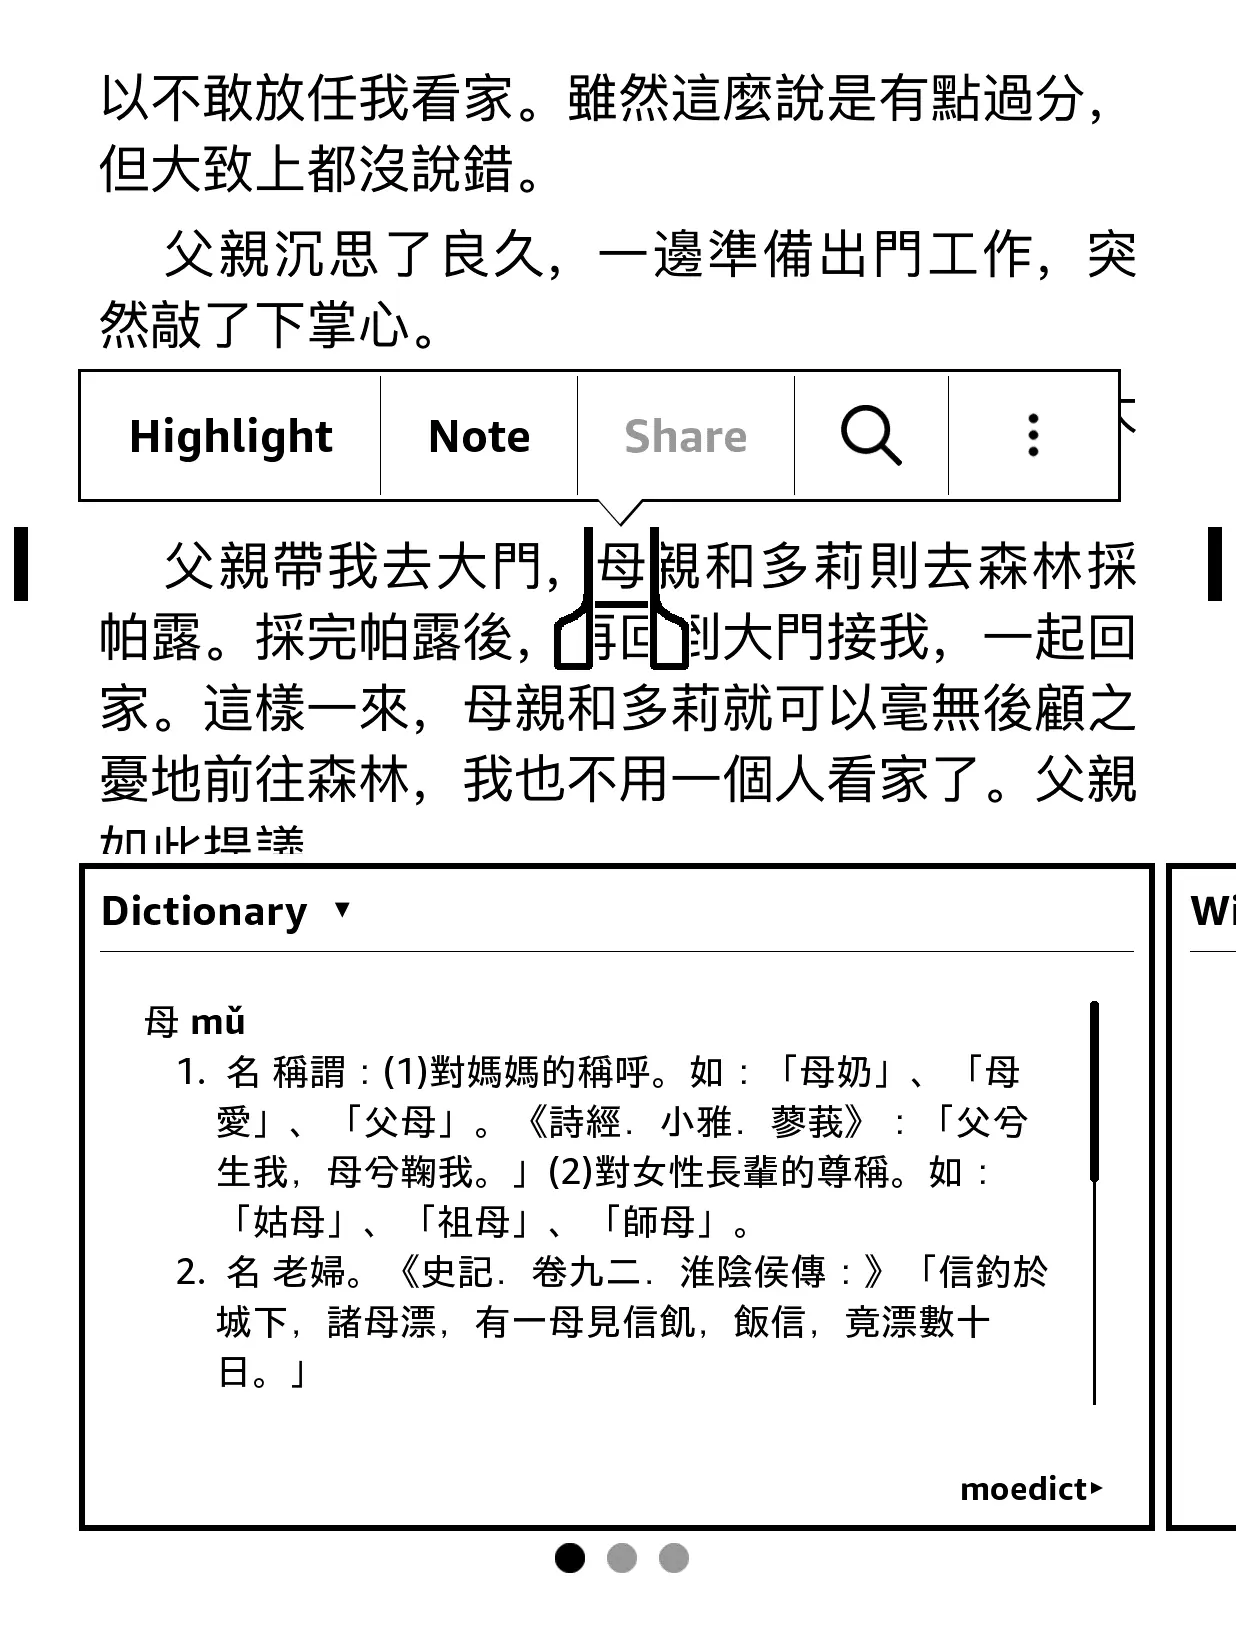
Still wanting to read on Kindle but without foregoing the convenience of a dictionary, I instead made my own. It is powered by the public-domain MOEDict dictionary data provided by the Ministry of Education of Taiwan. The code is here and you can see how it looks below:
By the way, if being able to read and understand those beautiful characters is something you are interested in, you can start learning Chinese characters with HanziHero for free. It's the application I helped create specifically so I could better read Chinese. It works!
In this post I'll go over step-by-step what is needed to create a custom Kindle dictionary in case you are looking to do the same.
- Overview and prerequisites
- Creating the files
- Building the dictionary
- Optimizations
- Conclusion and other resources
Overview and prerequisites
Every dictionary will consist of at least three to four separate files. Covering each by way of their extension/format:
- OPF package - the XML package file that outlines the overall structure of the dictionary.
- XHTML content - the various content pages of the dictionary. Usually just one for simple dictionaries.
- CSS styling - any styling you want to use across the dictionary will be here.
- PNG/JPG cover - every mobi needs a cover image, apparently.
Those files are packaged together via the kindlegen binary.
On MacOS you can get this by downloading Kindle Previewer 3.
It'll be located at /Applications/Kindle Previewer 3.app/Contents/lib/fc/bin//kindlegen.
Creating the files
Let's go over how to create each of the four main files needed for the dictionary, and how they relate to each other.
Cover image
The cover image is pretty straightforward to create. I just used the logo for MOEDict that I found on Wikipedia.
Anything works, though if you ever want to publish your dictionary through Amazon, you will want to use their publishing guidelines for cover images.
XHTML content
The XHTML content files are the tricky part. To begin with, it will need the following skeleton markup.
<html xmlns:math="http://exslt.org/math" xmlns:svg="http://www.w3.org/2000/svg"
  xmlns:tl="https://kindlegen.s3.amazonaws.com/AmazonKindlePublishingGuidelines.pdf" xmlns:saxon="http://saxon.sf.net/"
  xmlns:xs="http://www.w3.org/2001/XMLSchema" xmlns:xsi="http://www.w3.org/2001/XMLSchema-instance"
  xmlns:cx="https://kindlegen.s3.amazonaws.com/AmazonKindlePublishingGuidelines.pdf"
  xmlns:dc="http://purl.org/dc/elements/1.1/"
  xmlns:mbp="https://kindlegen.s3.amazonaws.com/AmazonKindlePublishingGuidelines.pdf"
  xmlns:mmc="https://kindlegen.s3.amazonaws.com/AmazonKindlePublishingGuidelines.pdf"
  xmlns:idx="https://kindlegen.s3.amazonaws.com/AmazonKindlePublishingGuidelines.pdf">
<head>
  <meta http-equiv="Content-Type" content="text/html; charset=utf-8">
</head>
<body>
  <mbp:frameset>
    <!-- entries go here -->
  </mbp:frameset>
</body>
</html>
Woah! Really puts the "eXciting" in XML, doesn't it?
All of our entries will go in that mbp:frameset element.
Here is an example entry:
<idx:entry name="whatever" scriptable="yes" spell="yes">
  <idx:orth>HanziHero</idx:orth>
  <ol>
    <li>A Chinese character learning application. E.g., I learned to read Chinese with HanziHero.</li>
    <li>A user of said application. E.g., He is a HanziHero.</li>
  </ol>
</idx:entry>
Each is wrapped by a idx:entry element.
The idx:entry name is the name of the index, it can be anything but should be the same for all entries.
The idx:orth contains the actual headword of the entry.
In my case, it is HanziHero.
After that is the entry itself. It can be whatever you want, really. For this example, I have a basic ordered list of all of the possible definitions for that entry.
CSS styling
If you want to style your entries, simply create a stylesheet.css with the CSS rules you need.
It should be referenced in the head of your content xhtml files.
<head>
  <link href="stylesheet.css" type="text/css" rel="stylesheet" />
</head>
OPF index
The OPF index file is what really ties it all together. Here's the basic skeleton I used for moedict:
<?xml version="1.0"?>
<package version="2.0" xmlns="http://www.idpf.org/2007/opf" unique-identifier="BookId">
  <metadata>
    <dc:title>moedict</dc:title>
    <dc:creator opf:role="aut">moedict</dc:creator>
    <dc:language>zh</dc:language>
    <meta name="cover" content="my-cover-image" />
    <x-metadata>
      <DictionaryInLanguage>zh</DictionaryInLanguage>
      <DictionaryOutLanguage>zh</DictionaryOutLanguage>
    </x-metadata>
  </metadata>
  <manifest>
    <item href="../moedict.png" id="my-cover-image" media-type="image/png" />
    <item id="content000" href="moedict000.xhtml" media-type="application/xhtml+xml" />
  </manifest>
  <spine>
    <itemref idref="content000"/>
  </spine>
</package>
Most of these tags are self-explanatory.
You'll need to configure the various language tags to correspond to the in or out language you are targeting.
The most important part is the content item in the manifest, and the itemref that references it in the spine.
That is how you ensure the content file you created shows up in the final generated .mobi file.
Building the dictionary
Once the main parts are in place, building it is quite simple.
Just run kindlegen with your options of choice.
"/Applications/Kindle Previewer 3.app/Contents/lib/fc/bin//kindlegen" -c0 your-file.opf
The only required parameter is -c0 which refers to the level of compression.
I use no compression instead of -c2 because -c2 was causing a segmentation fault for me.
Optimizations
For building a basic dictionary, that is all you will need. However, if you have a lot of data you need to include, you will want to include some additional optimizations.
Split the content into many pages
The main one is splitting the content into many different files. If you don't do this and have a large dictionary, it will take hours to generate. By splitting the content into different files, you can reduce that by orders of magnitude. I use about 1,000 entries per content page.
To do so, keep the same skeleton for each xhtml file, but only include a subset of the idx:entry for each file.
Then, make sure they are all referenced in the opf file you have. Like so:
<?xml version="1.0"?>
<package version="2.0" xmlns="http://www.idpf.org/2007/opf" unique-identifier="BookId">
  <manifest>
    <item id="content000" href="moedict000.xhtml" media-type="application/xhtml+xml" />
    <item id="content001" href="moedict001.xhtml" media-type="application/xhtml+xml" />
    <!-- etc -->
  </manifest>
  <spine>
    <itemref idref="content000"/>
    <itemref idref="content001"/>
    <!-- etc -->
  </spine>
</package>
Additional kindlegen args
I found a recommendation to include these additional kindlegen arguments, which you may want to include:
-gen_ff_mobi7- prevents kindlegen from trying to produce a KF8 format version of the dictionary, which takes time and is useless anyway.-dont_append_source- prevents the original source files from being included in the MOBI output, cutting the size in about half.
I use both of these for moedict.
Conclusion and other resources
With all of this, you should be ready to make a dictionary of your own. I hope to make another soon, next time using the cross-straits dictionary data.
Here are some of the resources I consulted when making this dictionary. I hope they will also be of use to you: